Note: this article assumes some basic understanding of the different photography exposure settings (ISO, aperture, and shutter speed).
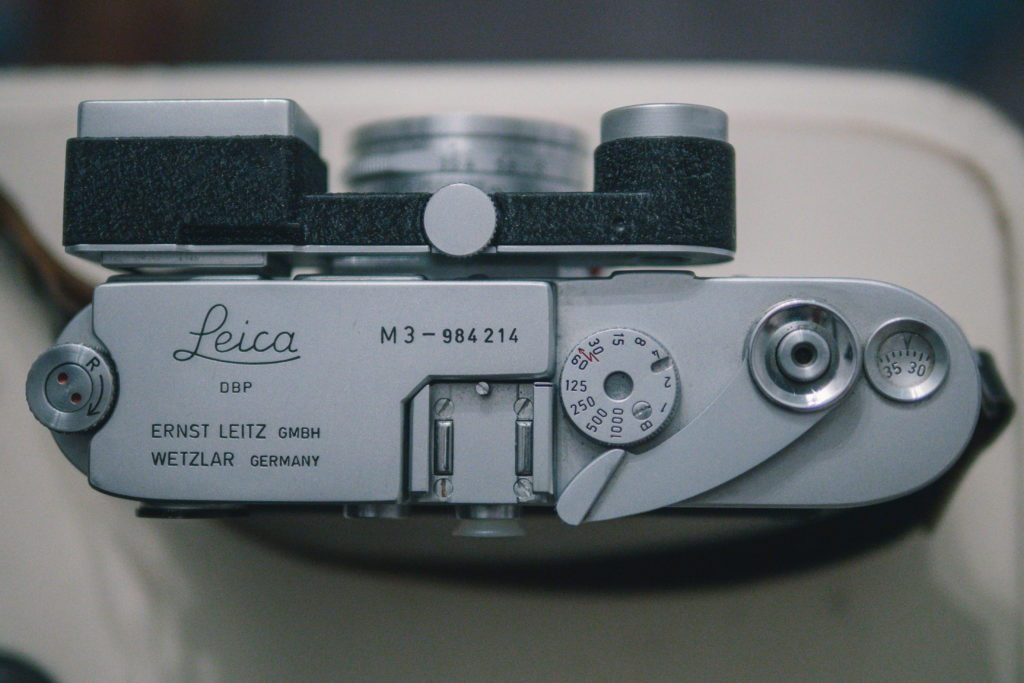
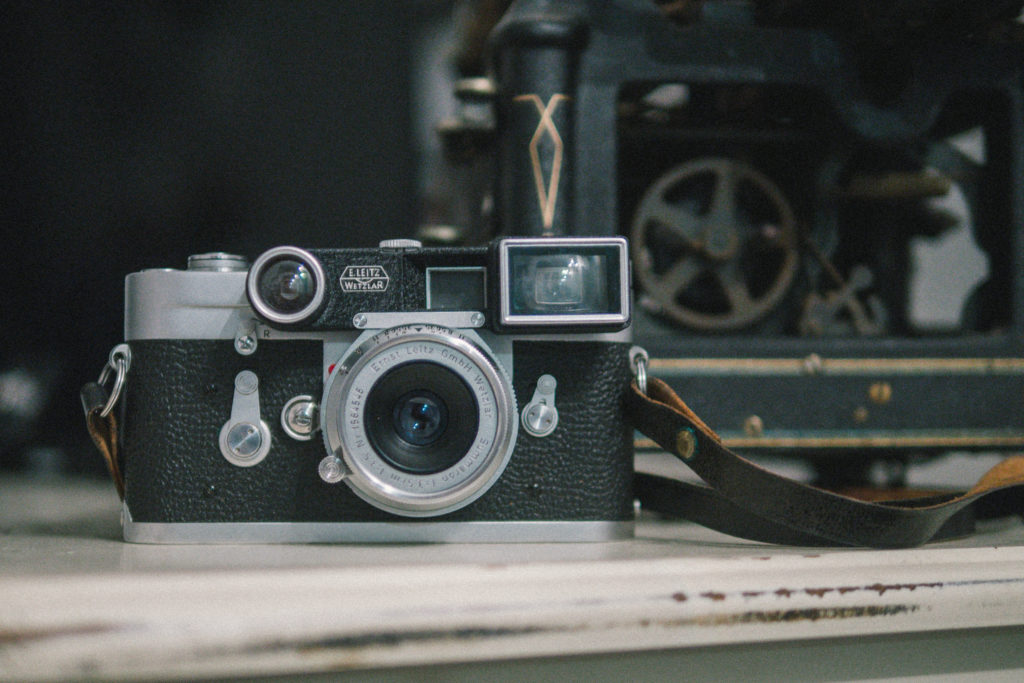
These days when I’m shooting film, I’m almost exclusively using full manual film cameras. My current cameras of choice are my Leica M3 (for 35mm) and my Fuji GW690ii (for 120mm). Both are fully manual, mechnical-only cameras. Shooting either requires you to set all exposure settings manually. One way to do this is to use an external light meter. Another is to simply use your eyes and brain to meter. Here’s how I do the later.
Why use a full manual camera?
You might wonder why one would choose to use a full manual camera instead of one with a light meter and/or automatic exposure metering built in. Here’s a couple reasons:
No drained batteries. There’s something quite liberating about never worrying whether your battery has enough charge left.
No faulty electronics. Besides worrying about batteries, you would also have to worry whether the electronics of your camera are still working. Remember, we’re talking about pre-90s tech here – finding replacement parts or a technician who can service these cameras will be tough. Or even in the case of some cameras, such as the recently popular Contax T2, basically impossible.
More control. You have total control over all the exposure settings of each photo. No worrying if the built in meter is metering off the correct point in the photo.
They’re usually cheaper. You’ll definitely pay a premium for built in light meters. Compare this Leica M2 on sale for $850, compared to this Leica M6 TTL, on sale for $1700.
Why not use an external light meter?
OK, so we’ve established some reasons why you might want to use a full manual camera. But why not pair that camera with an external light meter?
Light meters can also be expensive. A Sekonic light meter (the most common brand) can run you from a little under $200 to several hundreds of dollars.
They’re not always practical. For example, you couldn’t use an external meter for candid street photography.
You’ll look cooler. Impress your fellow photography nerds by correctly guessing exposure settings with just your eyes!
Step 0: Understand the Sunny-16 rule
The Sunny-16 rule simply states that, for shooting subjects in bright, direct sunlight, at f/16, the correct shutter speed will be the inverse of your film speed. So, at f/16, if you’re shooting ISO 100 film, the correct shutter speed to use is 1/100s.
Step 1: Set your aperture to f/16 and your shutter speed to the correct value based on the Sunny-16 rule
So, for example, if you’re shooting ISO 200 film, set your aperture to f/16 and your shutter speed to 1/200s.
Step 2: Determine your baseline lighting conditions
Think about the lighting conditions where you’re going to be shooting. Are you outdoors? Is it a totally cloud-free, bright day? Is it slightly overcast? Is it near sunset?
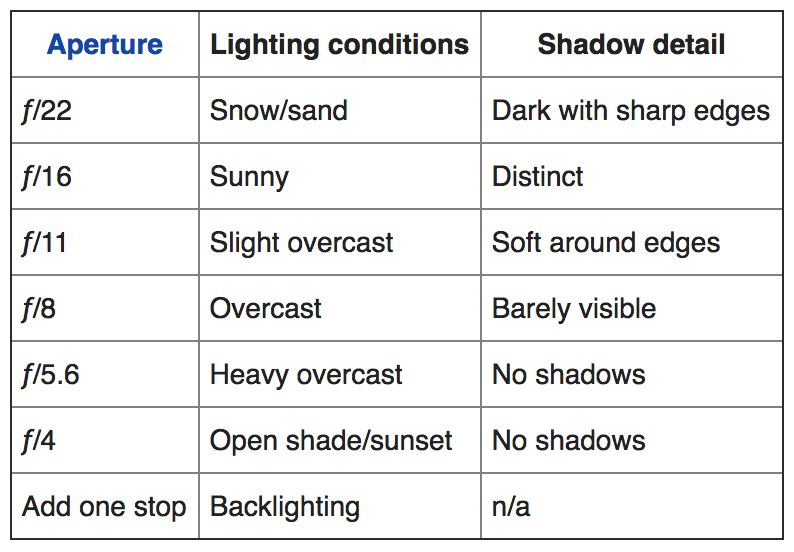
The Wikipedia article on Sunny-16 will tell you how to change your aperture based on your lighting conditions. There are two easy ways to gauge your lighting conditions: either by the amount of available sunlight or by the details of the shadows. If you’re planning to move around a bit, you should choose the conditions that most accurately reflect where you’ll be spending the majority of your time.
To continue our example, let’s say in Step 1 we set our camera to f/16 and 1/200s but we’re shooting on an overcast day. In Step 2, we’d change our aperture to f/8.
Step 3: Set your baseline exposure settings
After Step 2, we’re set to f/8 and 1/200s. If fine with both of those settings, we can use that as our baseline and move on. But, if for example, we wanted more depth of field or a faster shutter speed, we could use this intermediate step to find an equivalent exposure setting that accomplishes what we want. Let’s say we’re shooting lots of portraits and want some nice bokeh. We’ll widen our aperture by 2 stops to f/4 for some shallower depth of field, and bump our shutter speed by 2 stops to 1/800s to maintain an equivalent exposure level.
Step 4: Shoot! And adjust as necessary.
You’re all set to shoot! Remember the baseline lighting conditions that you are exposing for. As you move around, your lighting conditions will change.
Adjust as necessary using the table above. This is probably the most complicated part, so here are a few tips specifically for Step 4:
Tip #1 – Memorize the table if you can, save it to your phone if you can’t. Either way, you’ll want a quick and easy way to reference the table when necessary.
Tip #2 – Moving between each row in the table requires changing your exposure settings by one stop. Rather than recalculating all of your exposure settings again, just think about what settings you previously had, where you’re moving to, and how many stops are in between. Let’s say you were shooting in direct, overcast sunlight at f/4, 1/800s. But now you’re moving into open shade. Open shade is two rows below overcast, so you’ll have to increase your exposure level by two stops. You can do this by opening the aperture by two stops, slowing down the shutter speed by two stops, or any combination of aperture changes and shutter speed changes that results in two more stops of light.
Tip #3 – Count the dial changes. Sometimes it’s helpful to think purely in terms of dial changes (“I want two more stops of light, so I’ll widen my aperture dial by two stops”) rather than in exact exposure settings (“I want two more stops of light and I’m at f/8, so I’ll change to f/4”).
Tip #4 – If you’re confused, go back to your baseline and then re-adjust as necessary. Sometimes in the flow of things, you’ll end up with some strange aperture/shutter speed combination and you’re not quite sure how you got there. If you’re ever confused, just reset, go back to your baseline settings that you established in Step 3, and then re-adjust as necessary.
Some general advice
Practice, practice, practice. Like all skills, being able to meter using just your eye takes practice. The more you practice, the better you will become. You’ll start to develop a feeling for when you need to change your exposure settings. If you’re walking around doing street photography, a good rule of thumb is to actively reconsider your exposure settings every time you cross the street. Having a regular cadence for which you think about your exposure settings will help train those mental muscles.
You don’t have to be perfect. Color negative film and black-and-white film have very wide exposure latitude, meaning you can be off by a few stops and your photo will still look pretty good. Probably my biggest piece of advice for anyone trying out manual metering for the first time – it’s way easier than you think.
Err towards overexposing. Or, when in doubt – blow it out. In particular, the color negative and B&W film have great exposure latitude towards the overexposure side of the spectrum. They retain details in the highlights quite well, even if overexposed. If you’re ever unsure, err towards overexposing and throw in a few extra stops of light. I’ve shot many rolls of color negative film. I can only count a handful of times where I’ve truly ruined a photo by overexposing. There are a great many shots of mine that didn’t come out well because they were underexposed.
Guess and check. If you want additional practice, try looking at a scene, guessing what the exposure should be in your head, then verify your guess using the meter on a digital camera or a metering app on your smartphone (I have the Lux app for iPhone and it works decently well).
Happy shooting!
hello from Spain. Nice post. I have a question. I have a Yashica Fx3 full manual with light meter. I think it meters center weighted. I would like to use my internal light meter. So.. I have read in many places to meter in shadows. So if I am shooting towards a wall half sunny half shadow, I am supposed to meter in the shadow aerea until I see a confirmation green dot in my meter. So I over expose one or two stops, then take the photo. My question, that I cant find in anu place is, If the wall is completly sunny? Should I set my meter to green dot confirmation and do not overexpose 2 steps? So resulting exposure would be the same as the wall with half shadow? What about if the wall instead of receive a midday sunny light with a half shadow, it receives the light of golden hour? should I meter the shadow even if it is softer in the same way as the mid day light? Is a shadow of midday the same as golden hour in terms of metering? Is the internal metering calibrated to shadow in a very sunny day? I received few days ago my first roll scans (kodak ultramax 400) and there are many underexposed images. Hope you can help me.